Change remote ID (re-program handset) to disconnect synchronization between 2 bases

Please note, only doing this when failed to disconnect 2 bases synchronization after tried the below instruction
https://support.mlily.com.au/portal/en/kb/articles/iactive-remote-synchronization-desynchronization-instruction
https://support.mlily.com.au/portal/en/kb/articles/iactive-remote-synchronization-desynchronization-instruction
Step 1: Remove one battery
Step 2: On one remote hold the Head Up and Foot Up buttons (below image) on the remote control
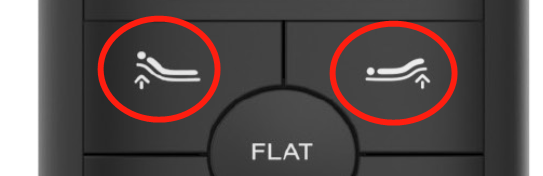
Step 3: Still pressed on the Head Up and Foot Up buttons, re-insert the removed battery
Step 4: Check the LED torchlight on the back of the remote control, the LED torchlight should start to illuminate
Step 5: After 5 seconds, the LED torchlight will lights off
Step 6: Release your fingers on the Head Up and Foot Up buttons, the LED torchlight will flash for 3 times, which indicates
the success of changing the remote ID/The remote is no longer paired to the base
Step 7: Re-pair the remote control with the base again

For paring the remote control with the adjustable base, please follow the below instruction
 Paring Process Paring ProcessPress and hold the Head Up and Foot Up buttons simultaneously and keep holding them. After 1 second, press the Reset/Pairing button on the power cord (fingers still pressing on the remote control buttons). If you are hearing beep sounds, it means the paring process is done successfully. You may release your finger from the remote control now. |